Quantcast
Channel: RetroFixes
Viewing all 54 articles
Browse latest View live

How to Clean & Store View Master Reels

$
0
0

The earliest reels date back to 1938 and are made from Kodachrome slide film.  Great care is needed when storing photographic film. Improper storage can result in fading, mold, scratches and dust. Kodachromes color if stored properly can last for up to 100+ years. Kodak recommends cool, dark and airtight containers. 


Cleaning:

  Supply List:
    • Hi-Polymer eraser sticks
    • Soft Brush (from photography supply chain)


    1. Hi-Polymer Sticks are great investments and can be used for a multitude of projects. These erasers remove wear marks and scuffs easily yet do not harm printed text on the surface. Older reels develop a dark ring along the outer edge, this is easily removed with the Hi-Polymer stick. Gently work the stick back and forth, rubbing off any visible marks.

    Dark Ring Removed

    2. Dust off any debris  from the reel with the soft camel brush. These best brush varieties are found in photography supply stores. Brush from the inside of the reel out. Work with each image square individually and carefully.

    Degraded paper sleeves can shed paper fibers over time. Replace them as needed.


    3. Please note that mold growth (looks like spider webs) will permanently scar the image and can not be removed. If stubborn dirt or smudges remain on the image after dusting there is one last option. A Microfiber Cloth.  You have to be positive that there is nothing abrasive remaining on the film or you will scratch it.  Take the cloth and carefully rub the image on both sides, this should remove stuck dust and debris.

    There are photographic emulsion cleaners on the market like PEC-12.  Technically this could be dabbed onto the microfiber cloth and used the clean the film.  It could also damage to the surrounding paper reel. This is very risky and should only be used as a true last resort!

    I hope that you find this website useful and informative. Please feel free to leave your comments and suggestions.


    Classic NES Nintendo - Beginners Buyer Guide

    $
    0
    0

    Where to Start?


    The NES (Nintendo Entertainment System)  is one of the most beloved gaming consoles. From 1983 - 1994 there were roughly 750 games released in the North American market! Today the system is relatively cheap and can be found at most swap meets and online auction sites.


    Before buying a vintage console there are a few things to watch for.


    Affordability:

    • The NES consoles sell for between $30 to $70 depending on the condition and accessories included.
    • Average NES games range from $5-$15, depending on rarity and quality of the game. Though some games are valued at $17,000!


    Required Accessory List:

    • AC adapter
    • RCA Cables (RF isn't needed)
    • 1-2 Controllers


    Common Problems:


      Upgrades & Modifications:


      Donkey Kong Junior Coleco Tabletop

      $
      0
      0

      Classic Portable Arcades

      There's something about these little Coleco hand-held arcade games that Video game enthusiasts love. Unlike other versions this model was more advanced, sporting a colored LCD display and mirror to create better visuals. Many of these vintage arcades have held-up very well over years but seldom are they clean. This tutorial covers the basics on tear-down and cleaning.

      Overview:

      • Original Price $60 
      • Release Date: 1983 
      • Manufacture: Coleco    
      • Today's Value $70-$150


      Watch video footage of the actual gameplay, this color LCD display was advance for 1983.


       Restoration Supply List:

      • Phillips Screwdriver Medium Sized
      • 90% Rubbing Alcohol
      • Windex or similar brand
      • Cleaning Swabs
      • Hi Polymer Eraser
      • Lint free cloth
      • Dawn Dish Soap or similar brand


      Lets Get Started:

      First Remove the 3 screws located on the right side. Note: Some models have the screws on left side.
       
      On the bottom plate remove the six screws as shows. The four corner screws are hidden under the rubber anti-slip feet.


      Separate the two halves as shown, the front faceplate will easily be removed during this step.


      The left half is attached to power and speaker wires.  This is a common area for power issues, check this area for loose connections.


       If the battery contacts have built-up corrosion clean them with swabs dipped in vinegar.


      Remove the top light panel, its has small clips in the right & left side. This aged plastic can be brittle, work carefully.
      This is the backside of the LCD. For this tutorial I did not disassemble the screen. There are several layers of colored filters over the screen producing the color effects.

      Remove all screws shown. 5 for the game controllers and 2 for the reflective mirror screen. 


      Once removed clean all the crevices, mirror & lcd viewing area with Windex / lint free cloth.


      Wash the pads and controllers buttons in dish soap and water. Inspect the silicon pads for splits or other damage. Mild cleaners will prolong the life of the silicone pads vs rubbing alcohol.


      Clean these contact areas with a Hi-Polymer Eraser (my preferred method) or rubbing alcohol.


      Once the plastic is clean and completely dry reassemble the arcade follow the steps above.

      How to Clean & Whiten Yellowed Plastics

      $
      0
      0


      White Famicom Comparison 
      Due to the increased traffic to this article and numerous emails I can no longer offer support or reply to comments/emails.This article is for educational purposes only. We cannot be held responsible for damages to you or your equipment.

      Why do plastics yellow?

      Manufacturers add bromine to ABS plastic to act as flame retardant. Over time, those chemicals react to the plastic's basic polymers and turn yellow. Sunlight and Heat accelerate this process.

      How is it Reversed?

      The process uses peroxide and  UV light (either a UVA bulb, or simple sunlight) to activate the reaction. This causes hydrogen to bond with bromine free radicals and restore the color.


      Before & After Restoration

      Methods of Treatment:
      1. Pure Hydrogen Peroxide with no additives. This is the easiest method and perfect for small items. The peroxide strength ranges from 3% to 12%.  Higher concentrations above %3 can only be purchased from Hair Salon stores. This is the simplest method IF the item can be completely submerged. Weaker 3% peroxide requires longer application time. 
      2.  Hydrogen Peroxide Homemade GEL. This method has many names online: seaglow, sauce & retrobright. Recipes & more info available online. Honestly I dislike to complicated process.
      3. Hydrogen Peroxide ready made GEL. This method is perfect for large items. The peroxide gel will stick to the plastic during application."Cream Peroxide 40Vol" 12% Strength. Its found in hair salon stores. Simple, cheap & works. Note: Some versions of Cream contain unwanted bleaching agents that can have unwanted effects on the plastic. Test your Cream before applying to your beloved item. I have also noticed the same issue with retrobright recipes.

      Before Cleaning

      Famicom with the common yellowed plastic.

      Pre Clean:

      Use protective goggles and rubber gloves. Strong concentrations of oxi-clean will  irritate your skin Place the mixture away from children or pets.
      Be sure to remove all nonessential items from the plastic. Soaking paper decals and delicate labels is  risky.  Add 2 Tbsp of Oxi-Clean / Oxi Magic per gallon of warm water. Mix enough solution and submerge the plastic.  Allow to soak for 15-30min, scrub stains with a soft toothbrush. Rinse completely after soaking. If plastics are not yellowed stop at this step!


      Peroxide Treatment:

      Use protective goggles and wear rubber gloves. Peroxide will  irritate your skin and can cause blindness! Place the mixture away from children or pets!

      Be sure to remove all nonessential items from the plastic. This method is only suitable for previously white or light gray plastics. Colored plastics will have mixed results and damage the surface color. Never treat paper decals and delicate labels. With the Famicom Console below I covered the main logo with clear scotch tape and trimmed the edges. The Japanese arrow stickers were unaffected by the peroxide.

      My Ingredients for this Tutorial:

      • Hydrogen peroxide 12%.  "Cream Peroxide 40Vol" Found at hair salon stores.
      No mixing or other ingredients needed.  The cream version works like a Gel and sticks to the plastic easily. 
      Use a brush and simply coat the entire piece of plastic. Make sure to coat all areas.


      Apply evenly

      Once coated, seal the item in a large ziplock bag or large clear garbage bag. Sit the item outside in direct sunlight. After 3-4 hours the item should turn to its original color, rotate item every hour.  Rinse and repeat until desired color is obtained.DO not allow the cream to dry! This will cause scars on the plastic surface.  Avoid hot areas such as black asphalt.

      3-4 Hrs Full Sun

      Rinse item completely and remove all traces of peroxide from the plastic. For a complete restoration use a topcoat of Novus Plastic Polish #1 or 303 UV Protectant. These will restore the high gloss and protect the plastic from future degradation.


      Remove Protective Scotch Tape.
      After Peroxide Treatment


      I hope that you find this website useful and informative. Please feel free to leave your comments or suggestions below.  Due to the increased traffic to this page and numerous emails I can no longer offer support or reply to comments/emails for this process.

      Natural Polish For Aluminum & Restore a Moka Pot

      $
      0
      0

      Before and After!
      A Moka Pot is an Italian steam-based stovetop espresso maker that produces a dark coffee almost as strong as that from a conventional espresso maker. These are most commonly used in Europe and Latin America. It has become an iconic design, displayed in modern industrial art and design museums. If you like coffee buy a Moka pot! They are affordable and fun to use.


      This pot need some serious cleaning before we brew the first cup. Bare aluminum has a tendency to oxidize and mask the true beauty of vintage pieces. When cleaned and polished it shines like chrome.


      Cleaning Aluminum Let's Get Started

      Item Needed: 
      • Cream of Tartar
      • Dish Soap & Scrubber
      • Toothbrush
      • Polishing Cloth, simple cotton cloth

      Start off by soaking the piece thoroughly in warm soapy water for 15mins. After soaking scrub away the top layer grime and coffee stains. 


      Next we need to make a polishing paste. Mix Cream of tartar with small amount water, the consistency should equal that of toothpaste. Cream of tartar is a by-product of wine fermentation and can be found in the spice section of the supermarket. 


      Buff the paste onto the surface of the aluminum. Aluminum is a soft metal and responds well to polishing. Use a polishing cloth, toothbrush similar item and scrub the aluminum. This may take several applications and your polishing cloth will turn black while removing the oxidation layer.


      Here is a comparison of the polished surface. Note the improvement on the right side.


      Depending on the condition of the aluminum it may take many applications to achieve a mirror like surface. Keep at it and replace your polishing cloth between applications.


      Before and After!


      After polishing rinse the item in warm water and dry.

      Sawyer ViewMaster Model E - Restoring -

      $
      0
      0

      The Model E was the last model constructed from Bakelite and had a retail price of $3.00.
      It's hard to imagine this today but ViewMaster was considered adult home-entertainment before 1966. The early image reels consisted of exotic travel destinations, architecture and natural wonders. When GAF purchased the company in 1966 the emphasis crossed over to cartoons, movies and children's television reels.

      Details:

      View-Master Model E
      Year of Production: 1955 - 1961
      Construction: Bakelite 

      Today's Value: $5-$10

      Repairs:

      Cleaning these early view masters is often necessary 30+ years can accumulate a lot of mold and dust.


      Supply List:
      •     Lint Free Cloths
      •     Dawn Dish Soap
      •     Plastic Pry Tool.
      •     Brasso Polish (optional)

      We'll start with the easy cleaning method first. Simply cleaning the back windows and inner optics will satisfy most users. Start with gently lifting the back window frames. These can be pried with any soft plastic tool. The trick is Wide and Thin otherwise you risk bending the frame. With light upward pressure the frame will pop-out.


      Clean the plastic window with alcohol and a lint free cloth. If the windows are in need of major repair or replacement view this article for more information.  

      Next dip a foam swab in rubbing alcohol and clean the inner lenses and remove all dirt / residue. 


      Inner view of lens


      The Complete Cleaning Method:


      If your viewmaster is extremely dirty a complete tear-down will be necessary. No screws are in these early viewmasters. The two halves are held together by barbed metal tabs at each corner. Opening the Bakelite models can be tricky since they are prone to chipping.  Carefully pry each corner open and work slowly. A thin plastic pry bar or credit card will help with this process.


      Pay careful attention to the original placement of internal parts. Set the metal parts aside and submerge the Bakelite halves in a mixture of Dawn dish soap and water. Soak for 30mins then lightly scrub and rinse the pieces. This is the safest cleaner for dirty or moldy Bakelite. Allow parts to dry completely before assembling.  

      Tip: Bakelite can also be polished with Brasso, read more here on the polishing process.


      After cleaning prepare the pieces for reassembly.
      Remember to pay close attention to the brass bars orientation and spring attachment point.

      Spring Attachment Point

      Tips:

      Its worth mentioning that a dirty reels shouldn't be inserted into cleaned viewers or vice versa. It is highly recommended to clean both. Read more on Reel Cleaning here.


      NES Satellite Wireless Controller Repair

      $
      0
      0
       
      The NES Satellite was Nintendos first wireless accessory. This was a major feat for late 80's gaming. This device allows up to four simultaneous wireless players*.  A small infrared receiver plugs into the NES console allowing players to sit up to 15-20 feet away. It also includes "Turbo" selectors for both the A and B buttons, instantly converting standard controllers into turbo models. Unfortunately it does have limitations in the design, mainly the line of sight wireless reception. This system works until someone blocks the receiver or the transmitter is moved.  Users have also reported response lag when using all four players simultaneously. It also required 6 large C batteries for power.

      Release Date: 1989
      Original Retail Price: $50?
      Current Value: $25-$50


      Repairs:

      The model I received had corroded batteries and rust throughout the unit. I knew that a complete rebuilt was necessary before attempting to use it. This page will document the process of a basic tear-down, clean &  rebuild.


      Supply List:
      • Phillips medium size screwdriver
      • Vineger
      • Oxi Clean 
      • Rubbing Alcohol
      • Toothbrush or other scrubbing tool
      • Protective eye-wear & rubber gloves


      First remove all the screws from the bottom of the unit and the receiver box. Fortunately all screws for the Satellite unit are identical. This makes reassembly much simpler.


      Here's a closeup view of the battery compartment. Make sure to wear protective gloves and goggles when working with battery corrosion!


      Next, in order to clean the plastic case we need to remove the motherboard. Remove all 4 screws as shown. Also unplug the black and red power wires  from the battery contact points.


      Check the motherboard and check for any signs of rust or residue, clean if necessary. Alcohol and a toothbrush will remove stubborn rust stains.

      Carefully remove all the metal parts from the battery compartment. These can be cleaned in a simple overnight soak in Vinegar. Vinegar is a Eco friendly rust remover!


      Soak the metal parts for a few hours or more depending on the severity of the rust damage. Rinse parts thoroughly after soaking.


      My favorite way to clean and brighten plastic parts is Oxi-Clean or any generic version.  Take all the parts and soak them for a few hours. I typically use 2tbs per gallon of hot water. This process should remove 90% of the rust stains and grime. Products like CLR will remove all traces of rust if this is a major concern in your restoration.


      As you can see the vinegar soak completely restored the metal.


      Once the all plastic is clean and dry reassemble the unit  follow the steps above in reverse order.


      In all, if you can find a cheap NES Satillite (under $30), I say go for it. It's a neat piece of Nintendos history and the NES system looks cool with the receiver installed.  I like this accessory, but use it in moderation due to the battery consumption.  Note: Rechargeable AA batteries can be used with the help of AA to C adapters. These are plastic shells that fit around the AA battery increasing its size. Easy to find via eBay $2-$3


      I hope that you find this website useful and informative. Please feel free to leave your comments or suggestions below.


      NES-101 TopLoader AV Mod Kit Instructions

      $
      0
      0
      SAFETY:
      Please take proper safety precautions when dealing with electronics and soldering. Have proper ventilation and a clean work area. Research basic soldering technique if in doubt.  I cannot be held responsible for any damages that could occur to you or your equipment while following (or misreading!) the procedures present on this Website.


      This Kit can be purchased or installed from my store here

      Why Upgrade:
      The NES Toploader was a great console but lacked quality video & sound. With this AV upgrade all Modern TVs and international users will be able to enjoy 8bit gaming.   The video and Sound is crisp and clean. No static, fuzz or buzz.

      Enhanced Audio:
      The NES has been designed to output mono sound. You will hear the same sound in both speakers.It is possible to do better by modding the NES with "Enhanced Audio". The NES CPU (2A03) has 2 sound outputs. One carries the 2 square wave channels and the other one carries the triangle wave channel, the noise channel and the sample channel. By tapping directly on the CPU pins it is possible to direct the 2 sound outputs to different speakers, thus obtaining Enhanced stereo like audio sound.


      Please research basic Soldering before attempting this install.  Wires will need to be stripped and tinned before soldered in place.  Proper soldering temperatures and guidelines need to be followed. 
      Youtube "soldering 101" for assistance.


      Tools:
      • Security Bit 4.5 mm
      • Medium Sized Phillips screwdriver
      • 30w Soldering iron (preferably with a small tip)
      • Solder
      • Wire Strippers
      • Drill with 1/4 inch drill bit
      • Micro Flush cutter or some kind of mini cutters


      Board Wiring layout:
      • (21) Composite Video input /  Connects to the PPU chip Pin 21
      • (C)  Composite Video output / Connects to the RCA jack that will carry the video signal.
      • (5)   Connects to 5v power source
      • (G)  Connects to Ground tabs of RCA jack
      • (AUD out)  Connects to Red and White RCA jacks for audio output. Not needed when selecting Mono option.
      • (AUD in) Connects to pins on CPU chip. Not needed when selecting Mono option.


          Before starting take time and clean a proper work area. This mod requires patience and a cluttered work area will not help you.


          (1) First step: There are four 4.5mm security screws on the bottom of the console. All screws will be represented as RED dots throughout this tutorial. Remove these and place the screws in a safe place. Next flip the console over and slowly remove the top plastic shell.


          (2) Now with the top shell removed you can see the motherboard & RF shielding. Remove all visible screws There are 3 gold tinted Phillip screws around the RF shielding and two silver screws at the cartridge slot.


          (3) Here is a quick overview photo of the motherboard connections.  All the remaining connection points will be located at the RCA jacks.

          Trim wires to desired length before soldering into place. Insure length clears RF shield.

          Once you are familiar with the soldering locations you can start wiring the Composite Kit and getting ready for the install.  The photos below show examples of a properly wired composite Kit.


          (4)The composite video source will be captured from Pin21 on the PPU chip.  For best video quality the pin must be cut. You can skip the cutting and solder directly to the leg but video will have "JailBars" aka faint vertical lines in the video

          Xuron 410 Micro-Shear Flush Cutter Perfect for trimming Chip legs.
          Tip: Rotate the snipers upside down from shown above. Makes for Cleaner cut.
          Pin is cleanly cut! Solder wire to reaming Leg

          (5) Power Source This wire powers the Composite kit. Solder the wire as shown. This wire is soldered to resistor R1, Study the photo and location carefully.

          (6)(AUD IN) Solder wire to the location shown below.  This step can be ignored if wanting original NES mono.  Mono installation shown below

          Enhanced Audio Install.


          If you wish to keep the original Mono NES audiosolder your audio wire here.  The other end will go directly to the Red and White RCA jacks.  
           

          (7)Our next step is to assemble the RF shields and motherboard back into place.  If you are installing the Power LED follow my  other article before placing the motherboard back into placeView Here


          Make sure the wires are in the correct spot and not pinched by the RF shield. Example of proper wire placement below. Composite board is screwed into place. This step also complete the Ground circuit. The board will Not work until screwed into place.


          (8)Belowwe have the motherboard and RF shield back into place. You should have 4 wires that are not yet connected. If using the Mono method you will only have 3 wires remaining.

          (9)Next we need to drill holes for the RCA jacks. Make sure to read through all the steps before Drilling. Measure twice and cut once! I start by marking 3 locations 12mm apart and 10mm from the bottom edge of the case. Examples shown below.
          12mm spacing.


          Location of the RCA jacks is important. Use my photo below as a guide. Please measure and drill carefullyDrill pilot holes with a smaller drill bit like a 3mm.  Then drill the final 1/4" holes. The end results are cleaner. Watch for stress on the plastic and work slowly. Set the drill at the slowest speed. Do not rush this step.


          (10) The last stages of the installation requires wiring the RCA jack.  Simply follow the images closely. Remember Yellow=Composite Video  Red+White=Audio


          Example of alternative mono installation. One wire for both audio jacks.


          Use small jumper wire and attache all RCA tabs to ground.


          Final Step:Carefully assemble your NES and pay close attention to the new wires when closing the body shell. Insert the 4 bottom screws and secure the case in place.
          Watchout when closing case.


          Done!  Play some games and test your new high quality composite. If the kit does not work re-read to instructions and double check your work.

          Open Hidden Sound Channels in the NES

          $
          0
          0

          Hidden Sounds?

          The original Famicom (Japanese Nintendo) consoles are superior in design compared to the American NES. One long forgotten feature is the extra sound channel, this extra channel was disconnected on US console and removed from US games. Castlevania 3 is a classic example. The original Japanese version has a much different theme song.


          With the development in modern SD card to NES adapters like PowerPak/EverDrive kits and Famicom game adapters it is possible to play Japaneses games on the NES & hear the lost sound channels.


          Original Famicom
           Note: This guide is for the classic American Nintendo NES-001 front loader. This will not work with the later redesigned top loader NES-101.


          Supply List:


          To get expansion audio activated you only need to add a resistor inside your NES.

          • Phillips Screwdriver Medium Sized
          • 47k resistor ** Update I find 24k Resistor has much better sound**
          • Soldering Iron & Solder

          If you need help dismantling a NES please view my tear-down article. Here.
          The Mod area is located under the black cartridge loading  tray.


          Solder a 24k resistor between pins 3 and 9 of the NES expansion connector.  The resistor value can be changed to get different volume on that channel, most pick between 20ohm to 50ohm resistors.  This area is located on the top of the motherboard, near the infamous 72 pin connector.


          This mod is also compatible with my stereo output instructions found here. The extra sound channel will play through the stereo feature.


          So there you have it, super simple mod and fun.  

          If you have any questions let me know!

          Connect a Famicom to American Televisions

          $
          0
          0

          Wanna play Famicom?

          Japan Channels 1-2 are not the same as USA channels 1-2.

          Channel frequency divisions in the USA are a little different and we need to fool our American Television.

          Do not use the original Famicom RF cable that comes with the console.

          Instead replace it with a common gray box American Nintendo RF cable. The NES, SNES, N64 and Gamecube RF is also compatible.

          On the back of the Famicom Select "Game" and select Channel 1

          Tune your Television to 95 and it should work.
          If you have any difficulty select Channel 2 on the famicom and tune the to channel 96.

           
          Channel & Mode Switch

          OK Lets recap

          • Don't Use the original famicom RF cable
          • Replace it with a standard American version (standard gray box NES)
          • The rear of the famicom has channel 1 or channel 2 output
          • Channel 1 = American 95
          • Channel 2 = American 96

          Famicoms can now be upgraded to composite video! Works on all modern HDTVs and classic CRTs.  No RF cables or weird channel settings required. I am offering this upgrade service for Famicom and many other classic consoles. More info here

          http://www.retrofixes.com/2015/02/famicom-nintendo-av-led-upgrade.html

          Circuit Bending the Speak & Spell

          $
          0
          0
          Full updates Coming Soon.

          Back in 2007 I studied the world of Circuit Bending.
          I built mutated Speak & Spells and hacked Drum machines. Full info on this project coming soon.


          What is Circuit Bending? 
          From WIKI: "Circuit bending is the creative, chance-based customization of the circuits within electronic devices such as low voltage, battery-powered guitar effects, children's toys and digital synthesizers to create new musical or visual instruments and sound generators.

          Emphasizing spontaneity and randomness, the techniques of circuit bending have been commonly associated with noise music, though many more conventional contemporary musicians and musical groups have been known to experiment with "bent" instruments. Circuit bending usually involves dismantling the machine and adding components such as switches and potentiometers that alter the circuit"


          Restoring Zaxxon TableTop Mini Arcades

          $
          0
          0

          Overview:

          Unlike other Coleco & Nintendo arcades this model was much more advanced.  It relies on a Dual vacuum fluorescent displays (VFD) and a mirror to create its image.

          Many of these vintage arcades have held-up very well over years but seldom are they clean. This tutorial covers the basics on tear-down, screen & Joystick cleaning.

          • Original Price $60 
          • Release Date: 1983 
          • Manufacture: Coleco
          • Today's Value $88-$150 


          Restoration Supply List:

          •     Phillips Screwdriver Medium Sized
          •     90% Rubbing Alcohol
          •     Windex or similar brand
          •     Cleaning Swabs
          •     Hi Polymer Eraser
          •     Lint free cloth
          •     Dawn Dish Soap or similar brand    
          •     Rubber Cement (for peeling labels)


          Lets Get Started:

          First Remove the 6 screws located on the bottom side. Note: If your battery contacts are corroded try cleaning them with vinegar and Qtips. Light grit sandpaper can also be used in extreme cases.


          Separate the two halves as shown, work slowly and be aware of the inner mirror.


          Now we have access to the two VFD screens and the reflective mirror.  Cleaning these screens will make a huge improvement with gameplay. This is a good opportunity to remove all surrounding dust and clean the motherboard.


          Below is a illustration of how the VFD reacts with the mirror. One screen reflects off the mirror, the other passes through creating a 3D illusion.


          Start by cleaning the mirror with Windex and a microfiber cloth. Clean gently and avoid scratching the surface. If needed you can remove this mirror, its usually glued into place. Caution it is fragile.


          Do the same for the VFD screens.


          This VFD creates the Flying Zaxxon ship.


          This VFD creates the background effects and enemy ships.


          Its a good idea to clean the Joystick and button controls.  Clean this area with alcohol (or electrical cleaner) with a qtip or cleaning swab.


          Next we can repair peeling decals and polish the plastic case.


          For peeling labels I prefer using Paper Cement. It's has a strong bond and is archival.


          Apply a light coat of cement to the decal and the plastic. Don't worry about cement running outside the edge, it is easily removed once dried.  Allow the cement to dry BEFORE pressing the decal back into place. This method ensures a strong bong.


          Once dry use a flat edged tool and push the decal into place. Work the decal and remove any trapped air bubbles.


          Last we can clean and polish the case with Novus #1 plastic cleaner. Buff the case with novus and a microfiber cloth. Try not to saturate the decals.


          Done.  Assemble the item following the steps above in reverse order.  Enjoy your Arcade.


          Vintage Apple-1 Sells for $905,000

          $
          0
          0
          $905,000 but power supply, display, keyboard Not Included..
          Bonhams auction house recently sold the  historical Apple-1 computer to the Henry Ford museum. Winning Bid $905,000!  When the Apple 1 was first released in 1976 it sold for only $666.66

          Henry Ford President Patricia Mooradian said in a statement. "The Apple-1 was not only innovative, but it is a key artifact in the foundation of the digital revolution," 


          What makes this item so special?

          These motherboards were each hand-built by Steve Wozniak in Steve Jobs' garage in Los Altos, Calif.
          It's one of only 50 known surviving examples.  A total of 200 Apple 1 computers were produced in 1976. This motherboard is one of the first 50 Apple computers and 1 of only 15 to be currently functional. Each board was signed "Woz" -- Wozniak's nickname.


          "The provenance on the Apple-1 is excellent and the condition is outstanding, so it was not surprising that it did so well," said Cassandra Hatton, the senior specialist in charge of the auction. "We are thrilled to have broken the world record for its sale, and are even more thrilled that it is going to a wonderful new home at the Henry Ford Museum."

          According to the auction house, the Apple-1 had been owned by John Anderson, the founder of the AppleSiders of Cincinnati user group, which still meets. Anderson acquired the computer in 1980. 


          Recent Sales History of Apple 1:
          In May 2013, another Apple-1 with its monitor sold at an auction in Germany for a $671,400. It also included the original owner's manual and a signed letter to the first owner from Steve Jobs offering a discount on an upgrade to the next model (the Apple II 4K), were included in the auction lot.

          A retired school psychologist from Sacramento sold a working Apple-1 without monitor for $387,750 at Christie's online auction to an anonymous bidder on July 10, 2013.

          Remarkably, the new record high price for an Apple-1 didn't beat the all-time record paid for a personal computer. In 2012 a custom one-off version of the 2013 Mac Pro, at the time not yet formally released, was auctioned off for The Global Fund through its (Product) RED campaign, and fetched $977,000 at auction.

          Courtesy of Bonhams

          Specifications:

          Processor: MOS Technology 6502 processor running at 1.023 MHz.
          Memory: Came with 4k RAM / expandable to 8k, 65k with hack
          Ports: any standard ASCII keyboard that could be installed and any monitor.
          Display: frame rate of 60.05 Hz, could support 40 characters per line at 24 lines, with automatic scrolling.


          Operating System:

          Woz built the Apple I to run BASIC, so games could be programmed and played on it. It was a game machine for the most part. Woz thought the binary switches of the Altair 8800 and similar PCs were not user friendly enough so he wrote a BASIC language assembler into the ROM by hand using only hex.

          Interesting Facts:

          Although the final pricing for the Apple I was $666.66, Jobs originally wanted to sell it for $777.77. Woz insisted that this price was too high so he agreed to sell it for $666. When he was later asked why he picked this satanic/mystic number he answered that he just took a lucky number 7, and subtracted 1. 

          TurboGrafx PC Engine Upgrades + Repairs

          $
          0
          0
          Released in Japan on October 30, 1987, and in the United States on August 29, 1989. It was the first 16-bit console.

          Why Upgrade?
          The Turbografx had RF connections only and therefor lacked quality video & sound. With this AV upgrade all Modern TVs and international users will be able to enjoy 8bit gaming.   The video and Stereo Sound is crisp and clean. No static, fuzz or buzz.


          What will you Receive?
          • Location of Jacks and LED are customizable!
          • Every console sent here will be upgraded, Internally Cleaned and Tested. Each console will have the PPU, CPU, Ram, caps and voltage regulator tested.
          • Will add Power LED! Location and Colors options available.
          • Clean Install of RCA Jacks on right or rear side (3.5mm Jack to RCA also Available, example photo shown)
          • Game slot and all connections will be professionally cleaned.
          • Motherboard is tested and set to original Factory Specs.
          • If needed Voltage regulator and Power Cap will be replaced.
          • Region upgrades can also be added.
          • Console will work for most international users! I have happy customers around the world :)


          TRRS Plug Example Atari 2600


          RGB, Cables, Upscalers & Retro Gamers

          $
          0
          0
          ScanLines ON/OFF

          RGB Basics:

          If you want to play retro consoles on HDTVs you should look into upscalers. These devices vary in price greatly. The CKITZE BG-460 runs as low $60 as seen here. It's a great budget minded upscaler. Ultimately most users are disappointed with the frame lag of low cost upscalers. Testing shows 5-6 frames of lag compared to 1 frame with the XRGB model. XRGB Mini ($300-$400) is currently one of the best video upscalers. The XRGB Mini was released to provide a simpler way to take multiple input formats and upscale them all to HDTV sizes 480p, 720p, 1080p.

          Why use Upscalers?
          Basically upscalers "preserve" the beautiful graphics from vintage consoles.HDTVs do not display vintage consoles very well, some do a horrible job. Upscalers converts legacy low resolution video formats to HD. Most HDTV's process HD video very well as it's their highest priority. Yet, most low resolution formats are an after thought and not displayed accurately. The XRGB Mini puts much care & effort into processing low resolution video formats. 


          Note: Upscalers are not needed for hardcore CRT lovers. You can find Sony PVM crt monitors for $250 or less and have direct RGB inputs. No upscalers needed. PVM article coming soon. Disadvantages: Heavy, seldom over 20", rare, fragile to ship.


          XRGB Inputs:
          • D-terminal (format used in Japan,easily converted to component)
          • Mini Pin / RGB (generally used with adapter for scrat cable input)
          • HDMI (2)
          • Composite with mono/stereo
          • S-video


          English users may need to upgrade the firmware: English firmware support has been added. You may need to set up the XRGB Mini firmware for English however, you can find the firmware here.   English remote decal overlays are available from eBay here.    


          My SNES RGB Mini VS Composite


          What is a  SCART cable?

          SCART stands for Syndicat francais des Constructeurs d'Appareils Radio et Television.

          A growing trend for retro gamers is using SCART for clear RGB video. Current day SCART connectors can carry RGB video, composite, digital, analog, S-video and stereo audio input and output signal in 1 cable.

          These were/are very popular in Europe and Japan.  The end of the SCART connector has 21 pins, so it is also referred to as a 21-pin EuroSCART connector.


          There is also a JP-21 Japanese  SCART with a different pin-out. This can cause confusion with new users. Pick a side early on before investing in cables etc. Euro SCART or JP-21. Generally in the US we are using standard NTSC EuroScart designed cables.   Also make sure to avoid PAL SCART in USA


          Displaying RGB from Consoles & SYNC (Basic list) 

          Where's the XRGB SCART input?
          If you use Japanese RGB-21 cables then you can use the bundled adapter with the XRGB mini. Note most users in the USA are not using this cable system and therefor can not use the included adapter cable. If you use Euro SCART like myself and many others then you must buy a Euro SCART to Mini adapter from seller retro_console_accessories on ebay
          Example of Scart Adapter & 3 Consoles via SwitchBox

          Where to buy Scart Cables?I prefer retro_console_accessories on ebay. High quality cables. She list sync methods and specs with each cable listing. I use these cables for all my testing and gaming setups.


          SYNC: Sync is the synchronization of lines on the display. Generally speaking RGB from cables boil down to these signals = RED, GREEN, BLUE & FORM OF SYNC. You have the choice of getting sync information from the composite video output, or directly from a pin that only outputs composite sync or commonly called CSYNC.  XRGB and other upscalers can be temperamental with certain sync methods.   

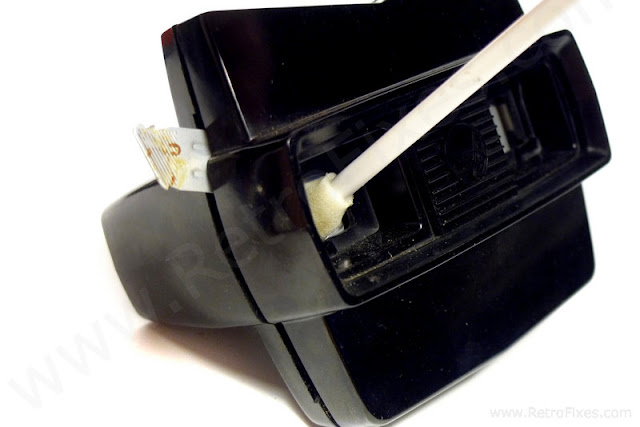
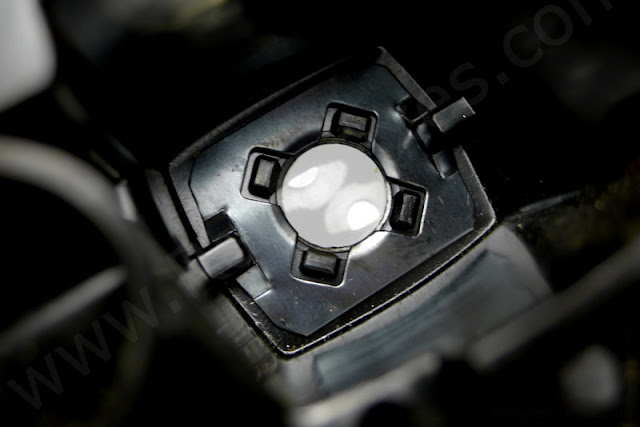
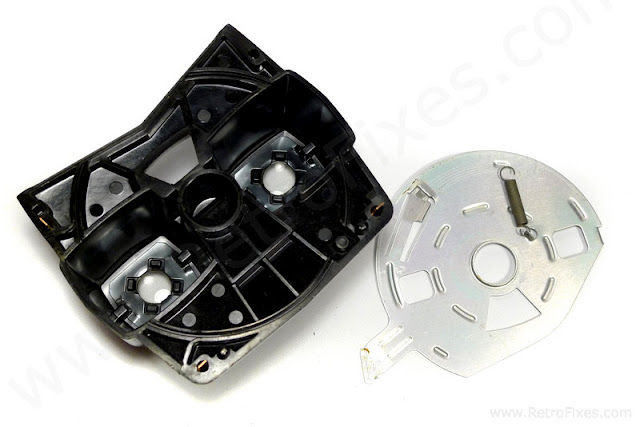
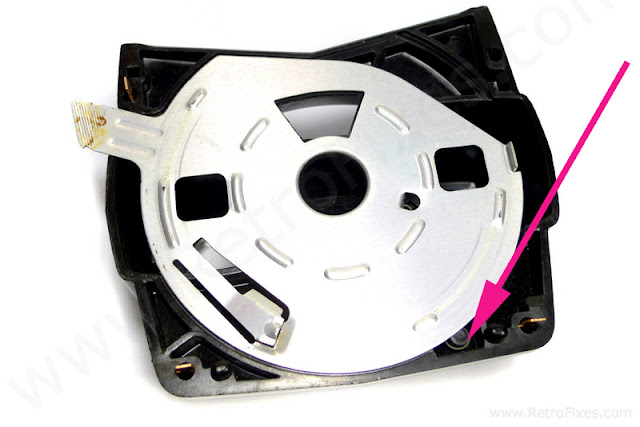
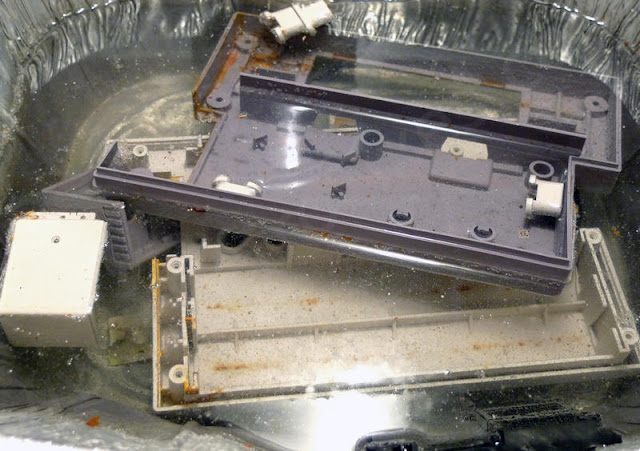
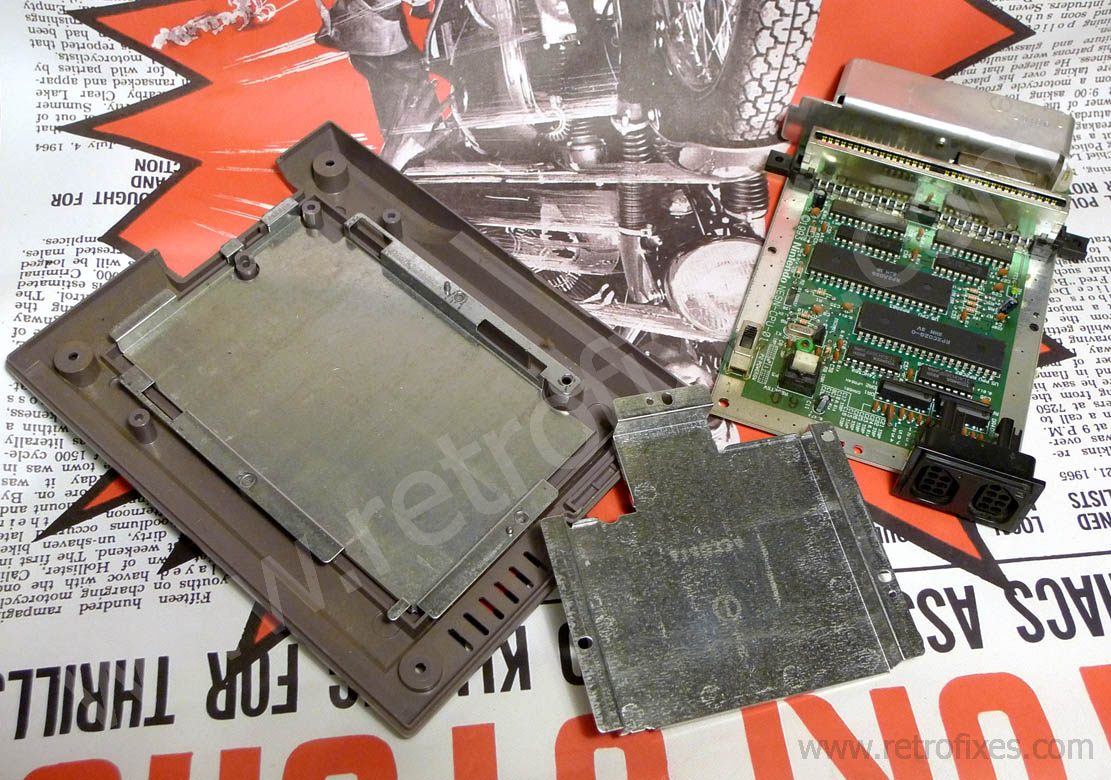
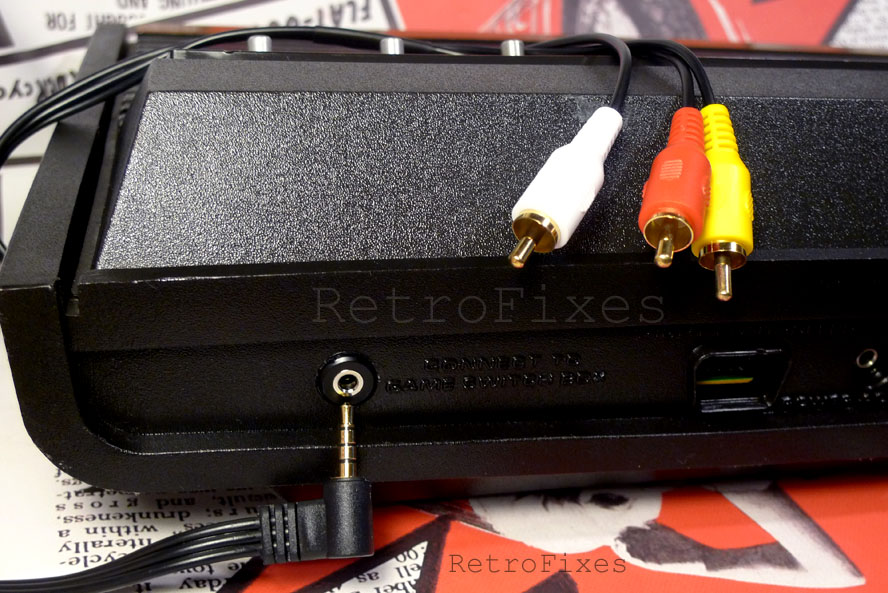
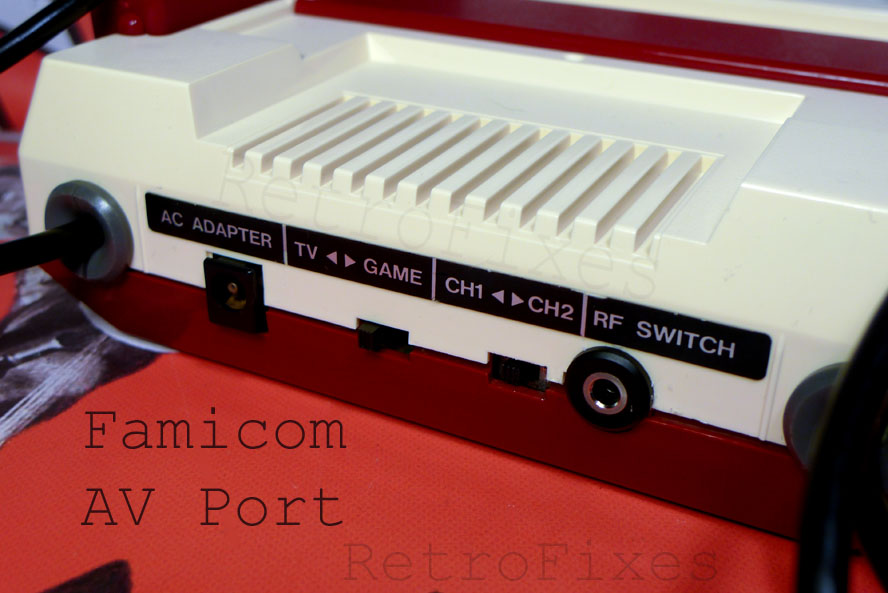
          NES / FamicomThe NES doesn't natively output RGB but NESRGB boards can be installed. I offer these upgrades in my storehere. The NESRGB board allows any sync method. Many prefer csync

          SNES Original Model  All the original SNES consoles natively output RGB. Most motherboard revision are infamous for blurry RGB signals. The 1CHIP motherboard is the sharpest model often found in original SNES consoles with a UN3XXX serial number. All original models output csync.   

          SNES Mini / Jr.  The SNES Jr does not output RGB. Upgrades Services are available in my store here. Once upgraded the SNES Mini outputs the best possible RGB signal, from all the SNES systems.CSYNC can be enabled. This is the preferred method when installing the RGB amp.This console can not use sync on luma cables unless it is modded for svideo.  

          N64  The N64 doesn't natively output RGB. Using "sync on luma" cables will solve all "crosshatching" issues when csync is not available. methods.  Upgrades Services are available in my store here. Several  upgrade method are currently available.  Tradition method is THS7314DR based amps. This can only be installed on early serial numbers NS1XXXXX.  Later NS2XXXXX boards require a more complex N64RGB circuit. Once upgraded the N64 outputs a wonderful RGB signal.  From my experience with NS1 versions onlyCSYNC can be enabled on CPU-03 motherboards. Later CPU-04 revision mostly output composite video as sync.   

          Sega Master SystemModel 1 will output RGB!  No upgrades neededunless you are wanting FM sound boards installed.   

          Sega Genesis All will output RGB!  More complex setups are needed for 32x and CD addons.

          Saturn Will output RGB   

          Sega DreamCastWill output RGB and VGA  

          PC Engine / TurboGrafx AV Composite is the best theses consoles offered. RGB amps can be installed. Contact us for a quote.   

          NEO-GEO All versions of the NeoGeo home console output RGB.  

          Atari 2600 No RGB.  I can upgrade these to AV or Svideo, see more here

          Famicom Nintendo AV + LED + Longer Controller Cord Upgrade!

          $
          0
          0
          Now Offering Famicom Upgrade Services.
          Availablehere
          The Famicom (Family Computer) was Nintendo's first home gaming console. By 1984 this was the best selling gaming system in Japan. This success paved the way for the American NES and forever changed gaming history. The Famicom boasted a larger game library, better audio capabilities and a unique design.  If you own one chances are it needs a major tune-up. Release Date: July 15th, 1983 Original Price:¥14,800 ($186) Official Games Released: 1,055 (more than NES)


          Why Upgrade?
          The Famicom was a great console but lacked quality video & sound. Plus RF connection from Japan may not work on all American TVs.  With this AV upgrade all Modern TVs and NTSC international users will be able to enjoy 8bit gaming.   The video and Sound is crisp and clean. A custom power LED will also be installed!  


          Update: Now I will offer optional longer controller cables of 6ft. The original famicom had short 3' cables. Pics coming soon!


          Original RF Port Replaced with 3.5mm Stereo Composite Video
           Clean Factory Look.
           Custom Power LED Light

          Exhibit to Highlight 30 Years of NES

          $
          0
          0
          A New York museum 'The Strong' is planning an exhibit for the NES.  

          Playing with Power: 30 Years of the Nintendo Entertainment System will make its debut this fall, and will showcase interviews with the hardware’s developer: Masayuki Uemura. The Strong’s official press release describes the upcoming exhibit:


          The exhibit will celebrate the 30th anniversary of the Nintendo Entertainment System (NES). The NES, adapted from the Famicom system that was released in Japan in 1983, revived the faltering American video game industry and introduced unforgettable characters like Mario, Link, and Samus. The NES/Famicom went on to sell more than 61 million units.

          The exhibit will explore the history of the console’s development and introduction, showcase artifacts from The Strong’s world-renowned collections, feature never-before-seen interviews with the NES hardware developer Masayuki Uemura, and include playable games, such as Super Mario Bros. and Duck Hunt.

          “Japan is home to a rich history of video game culture and pioneering companies such as Nintendo and Sony. This partnership allows for a cross-cultural exchange of ideas about how best to chronicle and conserve this important history,” stated John-Paul C. Dayson from The Strong.

          In addition, The Strong and the Ritsumeikan University will share research projects, while staff from both organizations may trade places as part of an exchange program."


          The 8-bit NES(Famicom) was released in 1983 in Japan as the Nintendo Family Computer and 1985 in U.S. and the following year in Europe.

          World 1-1 Documentary Review

          $
          0
          0
          In 1977 Atari 2600 entered the homes of the average middle class and revealed a new realm of entertainment.  Although Atari may seem simple to some, it’s the creative beginning, the unleashed genius that was the introduction of the now very successful gaming industry.  The independent documentary, World 1-1, uncovers the development of Atari from the company’s first game, “Pong”, to the devastating video game crash of 1983.

          World 1-1, a kickstarter funded documentary by Jeanette Garcia and Daryl Rodriguez, utilizes historical footage from the 1970s and several interviews with Al Alcorn, Garry Kitchen, and Howard Scott to discuss the early days of the gaming industry.


          The film also features an interview with Nolan Bushnell, founder of Atari. The movie details the elaboration of the first arcade game, explaining the construction consisted of makeshift televisions, bread pans and handmade circuit boards.

          While this amazing group of talented individuals formulated the design of PONG, they had no idea if
          it would actually work. The questions loomed; were video games for nerds only? Would the average Joe in a bar like video games? In the late 1970s that question had not been answered.  Soon Atari would become the fastest growing company in American history.


          World 1-1 also reveals details of the Atari game created by Dona Bailey.  Although female game programmers were very rare at this time, she developed “Centipede” a hit game using a highly colorful design scheme.  Although at first it was a technical glitch on the CRT, she decided to keep the colors.

          The film also highlights the birth of Activision.  With the rise in popularity of Atari, many of the programmers grew disgruntled with the management, and decided to create ActiVision.  Steve Jobs is also mixed into the story of Atari!  Ralph H. Baer is featured briefly as the inventor of the Magnavox Odyssey, pre dating Atari he paved the groundwork for home consoles.

          Overall the movie was an interesting insight into the historical aspect of the gaming industry. With fresh new interviews it presented a complete picture and filled in the gaps that I had been longing for.  However, the movie did leave me with a few questions regarding Ralph Baer.  A great addition would be a discussion on the true creator of Pong and the inclusions of the legality issues with Baer vs Atari. Baer is the true underdog story video games.


          Overall a great move B++ and I hope to see more from this directing Duo! Watch the trailer and you'll be scrambling to purchase a copy guaranteed.


          1917 Chalkboard Lessons found in Oklahoma School

          $
          0
          0

          OK this isn't about video games or vintage electronics but I love the story.

          OKLAHOMA CITY, Okla. —
          Before iPads, calculators, computers, smart phones schools were a little different in 1917. During a renovation project Wednesday contractors made a amazing discovery. 

          While removing chalkboards at Emerson High School to install whiteboards they discovered even older boards behind them. The hidden chalkboards date back to the early 1900s.

          “It was almost like a spiritual moment because people who had lived and played and worked in here ... a part of them is preserved,” Emerson High School Principal Sherry Kishore said. “It’s like you’re going back in time.”


          A single swipe of the hand could erase these historic writings. Yet they have survived for nearly 100 years. The chalkboards still had lessons written on them, on subjects such as multiplication and penmanship.


          Oklahoma City Public Schools said a lesson on pilgrims was found in every classroom.


          “The penmanship blows me away, because you don’t see a lot of that anymore,” Emerson High School Principal Sherry Kishore. “Some of the handwriting in some of these rooms is beautiful.”


          A spokeswoman said the district is working with the city to “preserve the chalk work of the teachers that has been captured in time.”


          The writing also gives us a glimpse into the teaching methods used in the early 20th century.

          Looking at these images I wonder if the teachers and students consciously left the lesson on the chalkboard? Was this their version of a time capsule? Or perhaps they saw no need to clean a chalkboard that was being replaced. We will never know but I love when we discover unexpected treasures.


          .

          NES RGB Mods Your Options & Common Questions

          $
          0
          0
          NESRGB Your Options & Common Questions

          Behold the Holy Grail of NES Mods! If want to know more about NESRGB installation options keep reading. I will add more infomation to this page as time allows. If you have questions about RGB video quality please visit this article. NESRGB can be installed on the Original Famicom, AV Famicom, Classic NES FrontLoader or TopLoader! Prices & Options vary for each console.


           For ordering and installation visit my store here


          NESRGB Board Features:

          • Works with the original NES processor chip. Parts are no longer taken from Playcoice 10 arcades.
          • Outputs RGB, S-video (encoded from RGB), composite video (encoded from RGB), and composite video (original from PPU). Component can be added for additional cost
          • Compatible with PAL and NTSC consoles (jumper selectable).
          • User selectable color palette. Three palettes available, Natural, Improved, and Garish. The Natural palette has the same colours as the original composite video output. 
          • Board Size in mm 98.2 * 52.5 * 3.7

           
          Example of Mini Din & 3.5 Audio Port

          Install Option Available:

          Palette switch options: (changes color levels on screen)
          -3 Position Color toggle switch usually placed at rear.
          -No switch / Fixed Color Pallet set to normal

          Video Output Connector options:
          -3D printed multiout connector SNES/N64 style. Outputs AV,  Svideo, and RGB. Made for Toploader.
          -Mini Din RGB Port, fully supported and SCART cables are easy to locate. Can also connect directly to XRGB Mini (cheapest output option) Works on Toploader or Frontloader NES.

            
          Audio options:
          -Improved Dual Mono Right and Left Channel.
          -True Stereo
          -Other audio options may be available.

          Suggested Add-Ons:
          -Region Free upgrade (for frontloader NES)
          -Check and adjust 72pin
          -LED Power Light or color change
          -Full case cleaning and polishing. 

          Included free with every upgrade:
          -Motherbord checked and repaired.
          -Voltage Regulator Replaced

          -Power Cap Replaced 
          -Nintendo Service System software cartridge ran on every console. Checks CPU,PPU and Ram for issues.


          Where to purchase the correct SCART cable:

          Mini Dins:

          Mini Din Cable
          Mini Din ports: Great cable and this port will save you money with NESRGB installs vs the custom Nintendo style multiport. . You can buy premade cables in the USA here


          MultiPort Version:

          For the 3D custom multiport you can use Nintendo style cables. The multiport has the ability to output RGB, Svideo and Composite. I install this port to accept Csync or Composite video sync RGB cables.  The Best producer of SCART cables in the USA is "retro_console_accessories" visit their eBay store here.


          Is your Head spinning? Need a simpler ordering method? Try this. 

          Common NES TopLoader Order:
          • Power LED
          • Enhanced Dual Mono
          • Mini Din Port (console will output RGB only) 
          • 3 Palette switch
          • Case Cleaning and & 72 pin check & adjust
          • The 3D multiport shown is the Mini Din alternative option. Advantage is Svideo, Composite and RGB output if the NES is modified to support it.  Also uses common SNES style RGB Scart cables. Additional Fee.


          Common Famicom AV Order:
            • Power LED
            • 3 Palette switch
            • Case Cleaning and & 72 pin check & adjust.
            • These famicom comes from the factory with built in multiports! RGB and Svideo can be added the the mulltiout.  
            • Overall cheapest method for RGB NES vs other models


            Common NES Frontloader Order:
            • Power LED color swap
            • Enhanced Dual Mono
            • Mini Din Port. Will output RGB only
            • 3 Palette switch
            • Case Cleaning and & 72 pin check & adjust
            • Motherboard check, and replacement of Power Cap and Voltage regulator always included. 
            • Common Alternatives : Additional Svideo port & restored Composite video


            Videos, Podcast Interview and More Explanations.


            "Back in my Play" PodCast Interview Discussing my website and console modifications. Here


            Viewing all 54 articles
            Browse latest View live


            Latest Images